

How To Draw A Hill Step By Step
How To Draw Mountains

The Etherington Brothers show how to draw interesting mountain shapes by adding drama with nature, such as wind, rain, & a sense of randomness.
Learn how you can draw… or learn how to think when you draw with the Etherington Brothers!

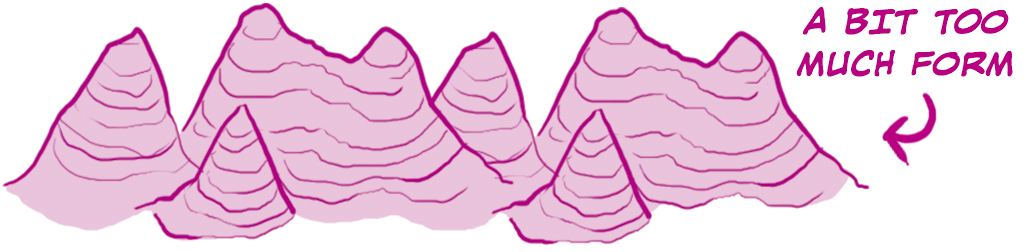
When drawing mountains in the background of your environments, try not to think of them like this…

…Or like this…
…But rather, think of them as a half-way point between the two, a sort of bas-relief:
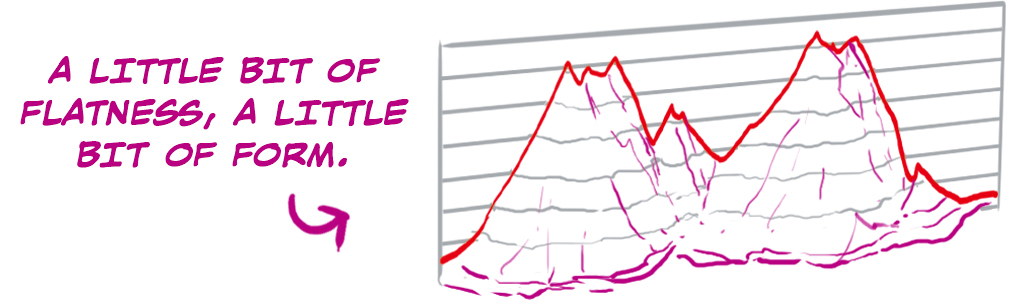
This approach gives your mountains a compressed perspective in which you can sense both the form and distance.

Let's look at a few design ideas which help visually describe your mountain's volume…
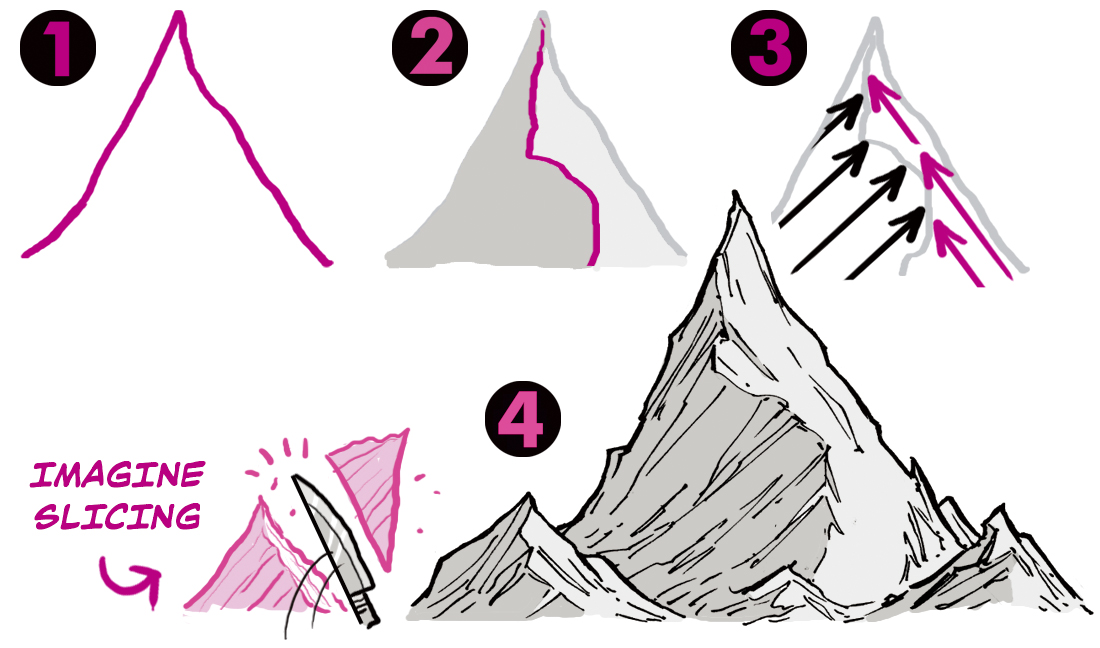
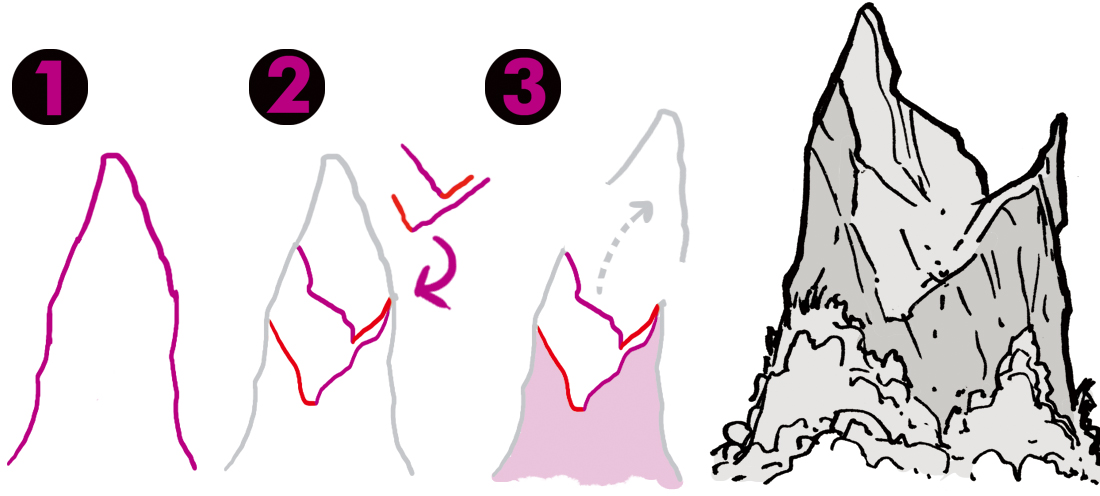
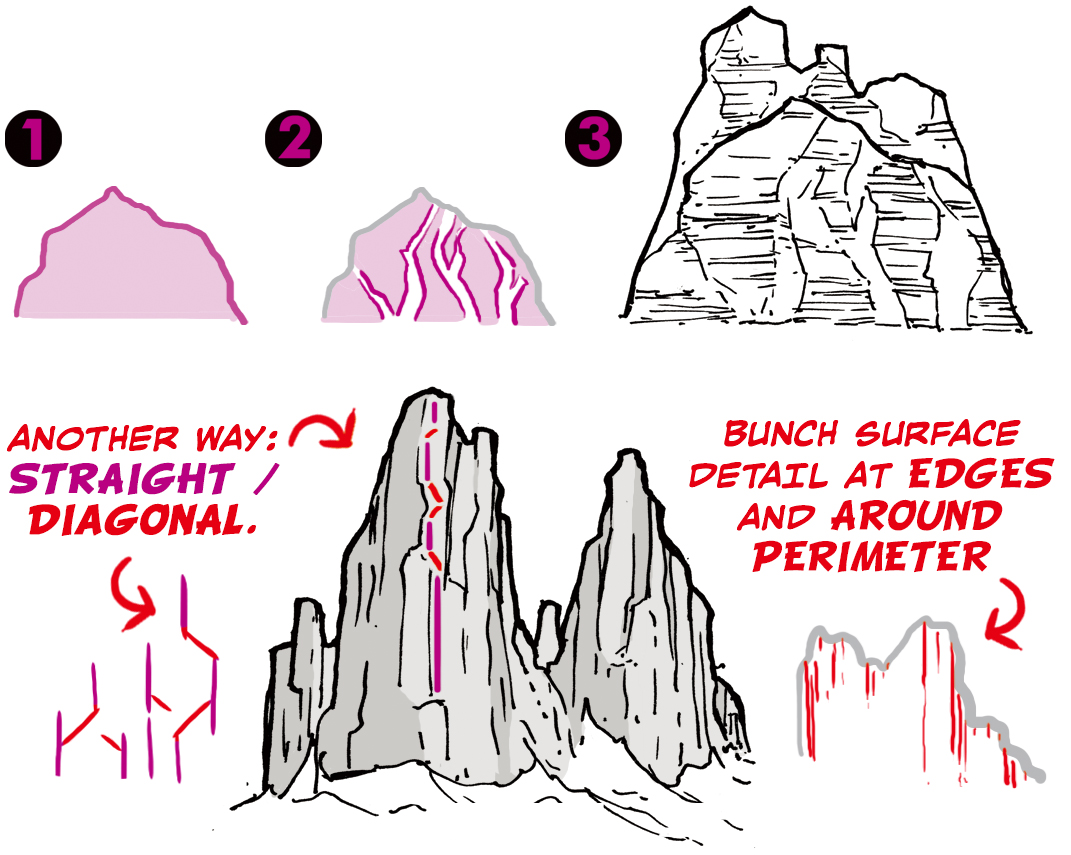
The split:
- Basic outline
- Random dividing line
- Opposing surface lines
- Add more surface detail on the side in shadow
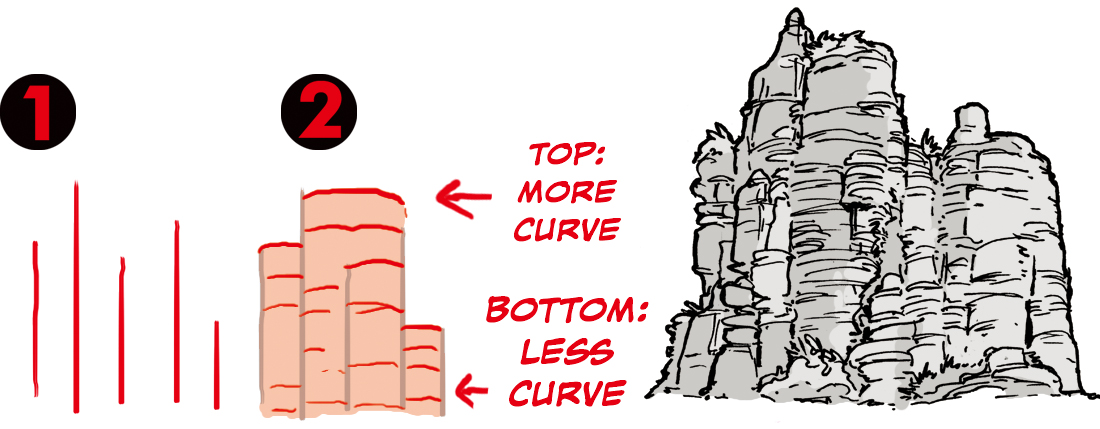
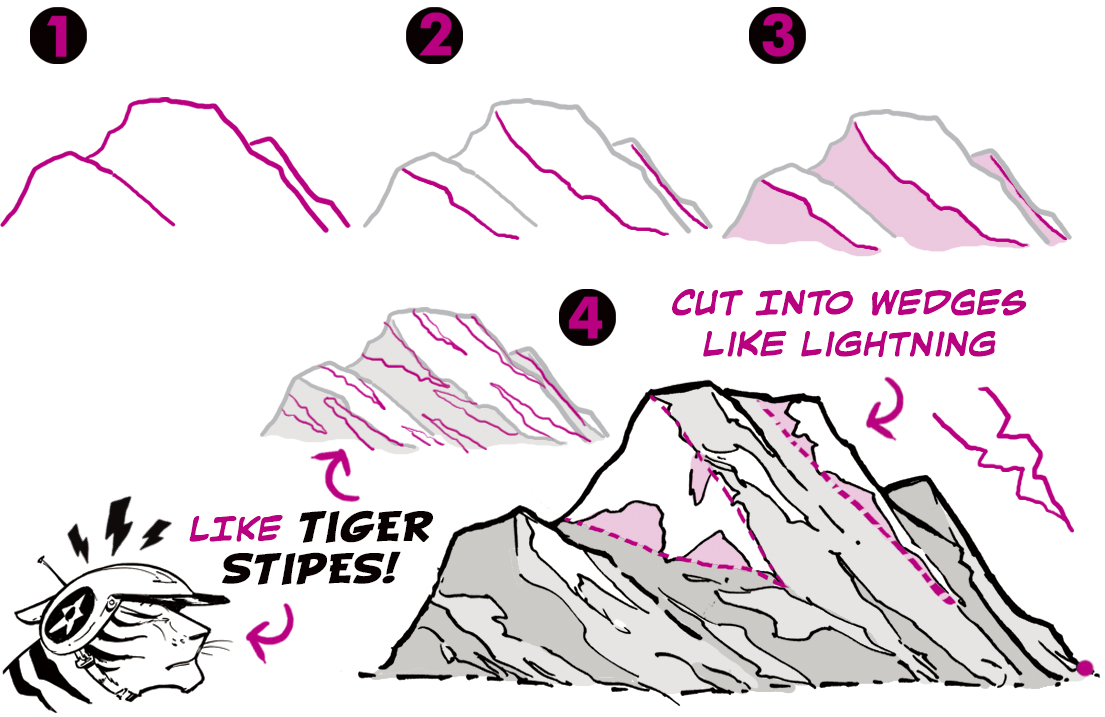
The strata lines:
- Lines of random heights
- Connect with arcs
The scoop:
- Draw random peak.
- Draw two rough "v" cuts.
- Remove top.
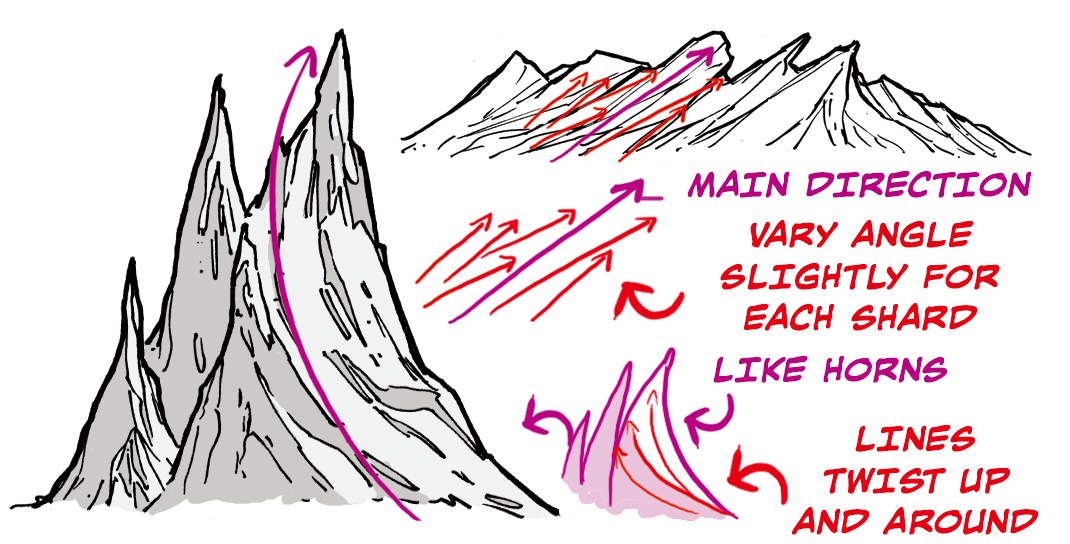
Add drama to your mountain ranges by thinking of them as shards, sweeping up.
To create realistic surface contours, the following technique is fast and effective.
- Draw peaks
- Imagine contours
- This establishes core surfaces
- Draw rough wedges; remember surface angles!
To help you vary the heights and positions, remember you're really always creating two mountain ranges.
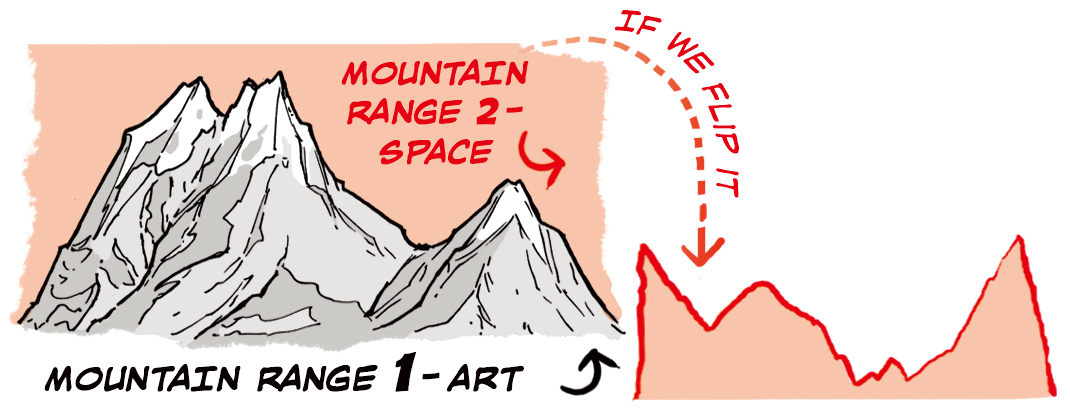
When the "mountains" in your negative space are interesting, your actual mountains will be too!
Here are some more ideas for surface pattern variations:
- Random mountain shape
- Draw "tree branches"
- Strata lines mostly in gaps
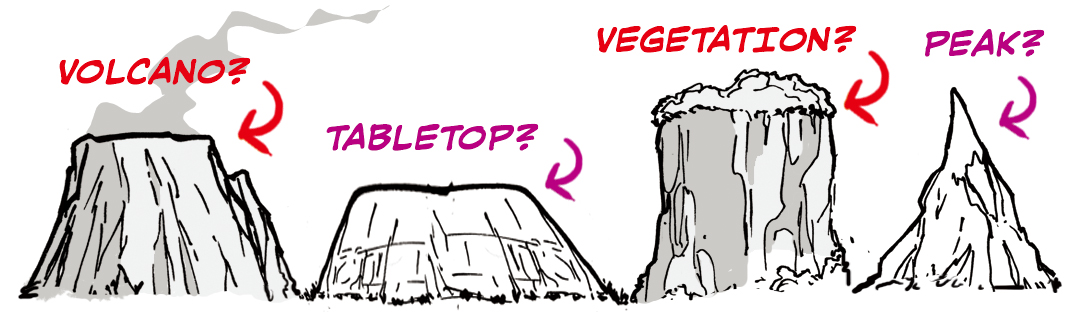
Think about your mountain tops. What kind of mountains are you looking to create?
How To Draw A Hill Step By Step
Source: https://www.clipstudio.net/how-to-draw/archives/163471
Posted by: murphyconst1993.blogspot.com
0 Response to "How To Draw A Hill Step By Step"
Post a Comment